왼쪽에 보면 필터가 있는데 그중에 Solution Type을 찾아서 필터옵션을 열어서 다른거 전부다 선택해제하고 Salesforce App만 선택해주세요.
그리고 Pricing섹션에서 Free만 선택하세요.
Features and Capabilities섹션에서 Lightning Ready를 선택해주세요. Supported Features에서 Lightning App Builder와 Lighting Experience를 선택해주세요.
Quiz
What is one benefit of logging in to AppExchange? A. You can access filters. B. You save time when you install a solution. C. You gain access to private developer forums. D. You can directly edit Salesforce code.
What area of AppExchange lets you discover solutions according to your business challenge or industry? A. Collections B. Explore C. Learn D. Consultants
Salesforce의 공식 앱스토어이며 유용한 앱을 무료또는 유료로 다운받아 설치할 수 있고, 커뮤니터로서의 역할도 합니다.
Define an AppExchange Strategy
사전에 약간의 계획만 세워도 사용자 만족도를 높이는 솔루션을 찾는 데 큰 도움이 됩니다. AppExchange 전략을 수립하려면 다음 질문들을 스스로에게 던져보세요.
Solution type: Salesforce와 빠르게 통합되는 솔루션을 찾고 계신가요? 그렇다면 앱과 같은 솔루션이 가장 적합할 것입니다. 아니면 복잡한 비즈니스 문제를 해결하기 위한 맞춤형 솔루션 구축에 도움이 필요하신가요? 이 경우에는 컨설턴트의 도움을 받는 것이 더 나을 수 있습니다.
Functionality: 솔루션은 어떤 기능을 수행해야 하나요? 필수 기능과 있으면 좋은 기능은 무엇인가요?
Budget: 적합한 솔루션이라면 비용을 지불할 의향이 있으신가요, 아니면 무료 솔루션이 필요한가요? 유료 등록의 경우, 선호하는 가격 모델은 무엇인가요? AppExchange는 일회성 결제와 구독 방식을 모두 지원합니다.
Stakeholder needs: 누가 이 솔루션을 사용할까요? 이해관계자들과 만나 요구사항, 기대치, 일정 등을 파악하세요.
Testing: 솔루션을 테스트할 수 있는 환경이 마련되어 있나요? 실제 운영 환경에 설치하기 전에 샌드박스 또는 개발자 에디션 조직에서 테스트하는 것이 좋습니다.
Technical considerations: 솔루션이 특정 Salesforce 제품, 에디션 또는 기능과 호환되어야 합니까? 구현의 특수성을 생각해 보고 해당 사항을 기록해 두세요.
위의
위의 전략들을 태양열 회사, Ursa Major에 적용해 보면 다음과 같습니다.
Criterion
Requirements
Solution type
솔루션이 좋을까요, 아니면 컨설턴트가 좋을까요? 이 프로젝트에 투입할 자원이 제한적이므로, 별도의 설정 없이 바로 사용할 수 있는 솔루션을 선호합니다. 즉, 앱과 같은 솔루션이 적합하다는 뜻입니다.
Functionality
누가 가장 자주 로그인하는지와 같은 사용자 채택 데이터가 필요합니다. 어떤 기능을 사용하는지도 알면 좋지만 필수적인 것은 아닙니다.
Budget
가능하다면 무료가 좋겠죠
Stakeholder needs
수집한 데이터를 Ursa Major의 경영진과 공유할 계획이시군요. 그들은 시각적인 자료를 선호하니 차트나 그래프로 데이터를 보여주면 좋을 것 같습니다.
Testing
새로운 기능을 시험해보고 Trailhead 챌린지를 완료하는 데 사용하는 개발자 에디션 조직이 있습니다.
Technical considerations
엔터프라이즈 에디션 및 Lightning Experience와 호환됩니다.
Quiz
What is AppExchange?
A. A vibrant community powered by admins, developers, and Salesforce partners
B. The unofficial Salesforce store for solutions and services
C. A place to connect with prebuilt solutions for business challenges you face
D. A and B
E. A and C
What is important to keep in mind when you develop an AppExchange strategy?
A. Think about whether you want a free or paid solution.
B. Have an environment where you can test the solution, like a Developer Edition org or a sandbox.
C. Avoid meeting with stakeholders, because they might slow down your search for a solution.
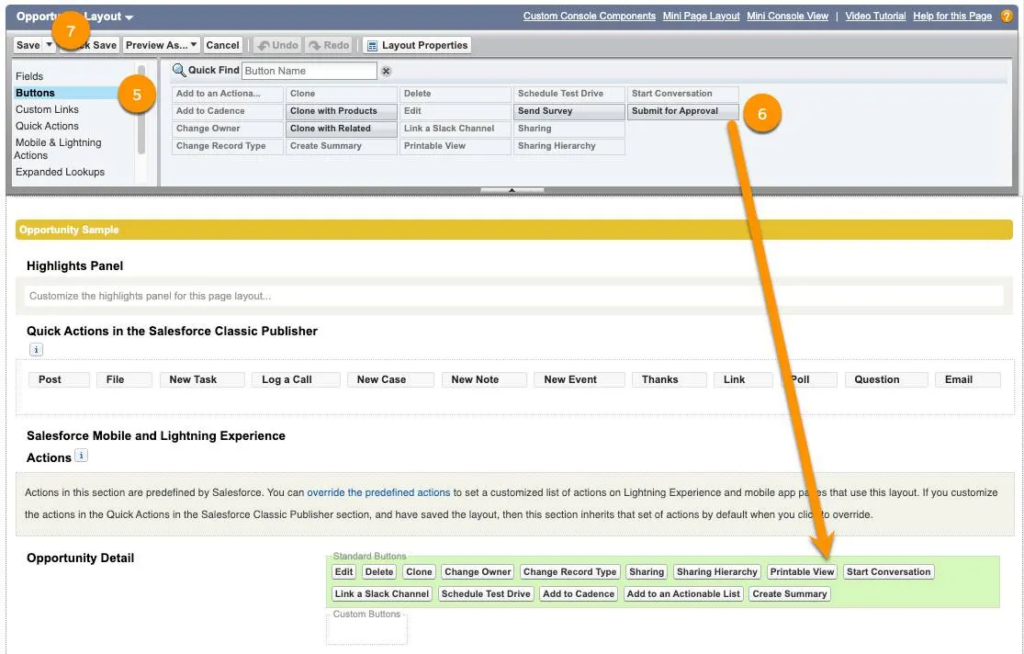
팔레트에서 Submit for Approval버튼을 끌어다가 Opportunity Detail에 있는 Standard Buttons섹션 안에 갖다 놓으세요
Save
만약 Dynamic Actions을 쓰고 있다면 Lightning Record Page에 이 버튼을 갖다 놓으셔야합니다.
Hands-on Challenge
Create an approval process
Create an approval process to ensure that prospect accounts with more than 500 employees are approved before they’re converted to customers
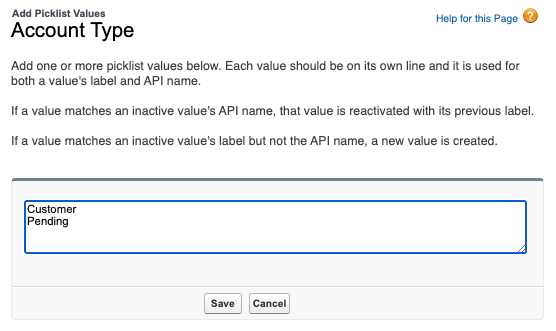
Before You Start Go to Object Manager. In Fields and Relationships for the Account object, check the Type field’s picklist values for Prospect, Customer, and Pending. Add any of these values that are missing.
Use the Jump Start Wizard to create an approval process:
Manage Approval Processes For: Account
Name: Approve New Account
Unique Name: Approve_New_Account
Approval Assignment Email Template: choose any template
Entry Criteria:
Account: Type equals Prospect
Account: Employees is greater than500
Approver:
Automatically assign to approver(s)
User: assign yourself
Add an initial submission action that updates fields:
Name: Account Type To Pending
Unique Name: Account_Type_To_Pending
Action: Update the Type field to Pending
Add a final approval action that updates fields:
Name: Account Type To Customer
Unique Name: Account_Type_To_Customer
Action: Update the Type field to Customer
Edit the existing final approval action:
Name: Record Lock
Action: Unlock the record for editing
Add a final rejection action that updates fields:
Name: Account Type To Prospect
Unique Name: Account_Type_To_Prospect
Action: Update the Type field to Prospect
Activate the approval process
풀이
Prospect Account가 500명 이상의 직원수를 가지고 있다면 Costomer로 전환하기 전에 승인을 받는 Approval Process를 만들거에요.
시작하기 전에
필요한 데이타가 들어가 있는지 확인해볼게요
Setup > Object Manager > Account > Fields and Relationships > Type
밑으로 스크롤해보시면 Account Type Picklist Values밑에 선택값들이 있습니다. 아래 3개의 값이 있는지 확인하고 없다면 추가해주세요.
Email Template Name: Approve Converting Account to Customer
Encoding: General US & Western Europe
Subject: Please approve converting this account to a customer
Email Body: {!User.Manager}, The prospect account {!Account.Name} has more than 500 employees. Please approve converting this account to a customer. Thank you.
Save
Approval Process를 만들겠습니다.
Setup > Approval Processes > Account > Create New Approval Process > Use Jump Start Wizard
Name: Approve New Account
Unique Name: Approve_New_Account
Approval Assignment Email Template: choose any template
Specify Entry Criteria
Account: Type equals Prospect
Account: Employees is greater than500
Select Approver
✅ Automatically assign to approver(s)
User: 본인 계정 선택해주세요
Save
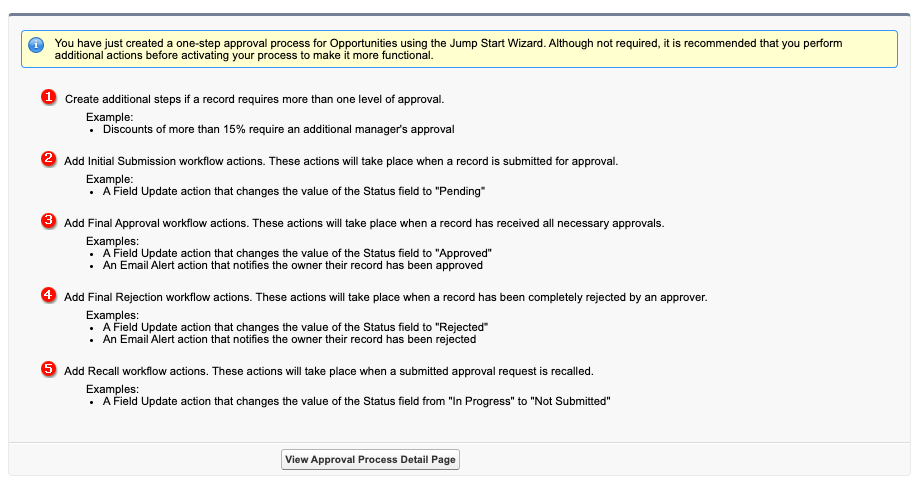
View Approval Process Detail Page버튼 클릭하세요
Initial Submission Actions > Add New > Field Update
어떤 직원이 승진이 하고 싶어서 보고서를 씁니다. 자기 승진좀 시켜달라고. 그러면 상사가 결제를 하겠죠? 근데 상사가 결제할때 승진은 안된다고 하고 거절하면 바로 그냥 돌아서는거고, 만약에 상사가 그래 내가 보기엔 너 승진하는게 맞아 그러면 사장님께 결제서류가 올라가겠죠? 그러면 사장님이 보고 오케이 하면 승진이 되는것이고 안된다 그러면 승진은 물건너 가는거죠. 이런 상사한테 결제 받는 일련의 처리를 시스템 안에서 알려주고 결제를 받고 하는 프로세스를 Approval Process라고 합니다. Approval Process를 만들려면 일단
어떤 단계를 거쳐서 어떻게 처리 할지 단계를 먼저 구상해야겠죠
그다음 누가 어떤 단계를 결제할지 승인할 사람을 결정해야해요
그리고 그 사람이 어떤 작업을 할지를 결정하면 됩니다.
Build an Approval Process
이번에는 실제 Approval Process를 만들어 볼건데요. 물건을 파는데 40%이상 할인된 가격으로 판매되는 건수에 대한거는 관리자의 승인을 받아야만 판매가 이루어지도록 제한을 걸거에요.
Preplanning
Approval Process를 만드는데 가장 우선적으로 해야할 일은 대충 뭘 어떻게 할지 단계나 처리 내용등을 계획하는 일이에요.
일단 판매시 할인율이 얼마인지 저장하는 필드가 필요해요 40%이상인지 아닌지를 확인하려면 말이에요.
Opportunity에 Custom field를 만들어서 몇% 할인받고 파는건지 저장해요.
그리고 어디까지 승인이 되었는지 그것도 계속 추적을 해야하니까
Opportunity객체에 Custom Field를 하나 더 만들어서 현재 승인상태를 저장해요
그 다음엔 40%이상 할인받는 판매건이 있다면 관리자에게 승인을 요청해야겠죠
여기가 바로 Approval Process가 필요한 구간이에요
만약 40%이상 할인받고 파는 물건이 있다면 관리자에게 알림을 해줘야해요
이메일을 보내서 승인해달라고 알리도록 할게요
관리자가 들어와서 승인을 하든 거절을 하든 승인상태를 수정할거에요
이때 Action은 승인상태 필드를 업데이트 하는거에요
이번 시간에는 대충 Approval Process에 대한 개념만 잡고 계획하는 단계까지만 했는데요. 다음시간에 이어서 계속 40%할인에 대한 관리자 승인작업을 계속 진행하도록 하겠습니다.
Quiz
In an approval process, the parts you define are: 승인 절차에서 여러분이 정의하는 부분은 무엇인가요?
A. Steps, approvers, and actions A. 단계, 승인자 및 작업
B. Requests, approvers, and approvees B. 요청, 승인, 승인 받는 사람
C. Submission actions and CEO approvals C. 제출 작업 및 CEO 승인
D. Submissions, authorizations, and Lightning actions D. 제출, 승인 및 Lightning 작업
True or false: there’s no reason to plan an approval process before you start creating it. 참 또는 거짓: 승인 프로세스를 만들기 전에 계획할 필요는 없습니다.
이번 시간에는 건의한 내용이 개선이 되면 개선된 날짜를 입력하는데요. 그때 해당 건의의 상태가 구현되었음으로 자동으로 바뀌도록 Flow를 만들도록 하겠습니다.
Add a Formula Field
건의한 내용이 개선이 잘 되고 있는지를 확인하기 위하여 개선이 안되었으면(Implemented Date가 없으면) 건의를 한 날짜부터 오늘까지 일수를 적어서 보여주고 개선이 되었으면(Implemented Date가 있으면) 개선되는데까지 며칠이 걸렸는지 보여주는 수식을 만들어 넣습니다.
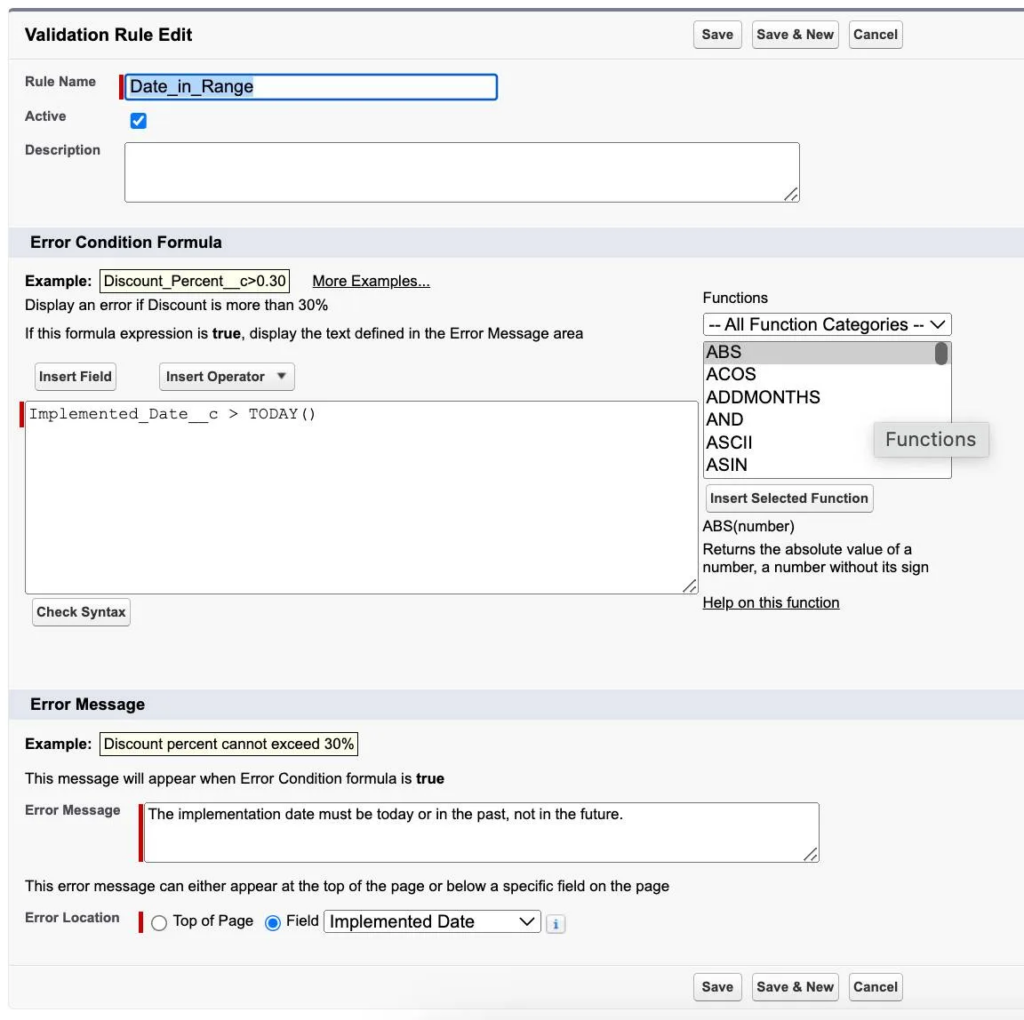
Error Message: The implementation date must be today or in the past, not in the future.
Error Location: Field=Implemented Date
Save
Add a Field Update Using Flow Builder
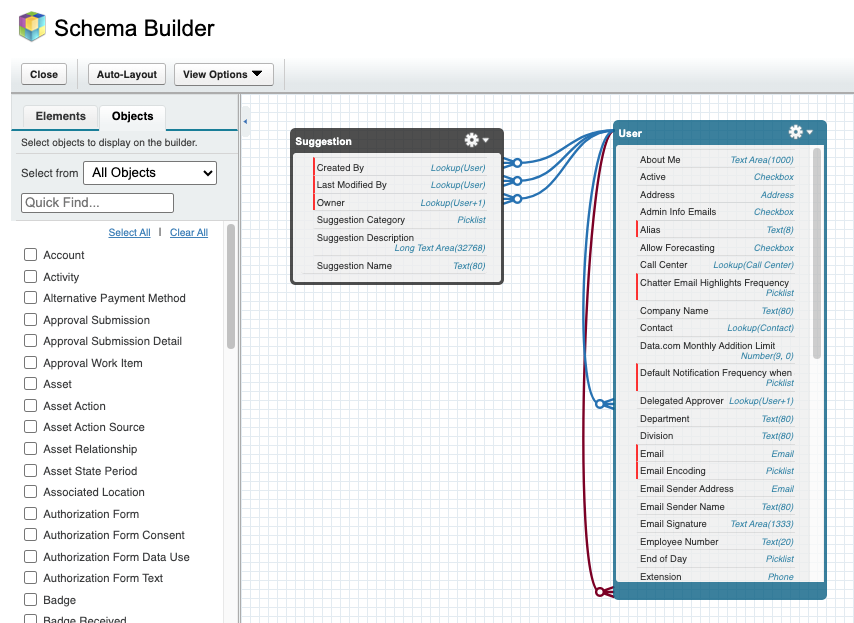
드디어 여기에서 Flow를 생성해서 Suggestion객체에 레코드가 생성되었거나 갱신되었을때, Implemented Date가 비어있는지 여부를 확인해서 비어있지 않다면 건의레코드의 Status필드를 Implemented로 자동으로 변경하는 로직을 만들도록 하겠습니다. 우선 Flow를 아래와 같이 생성해서 Flow Builder를 열겠습니다.
Setup > App Launcher > Automation > Flows > New
Frequently Used섹션에 Record-Triggered Flow를 선택합니다.
Select Object
Object: Suggestion
Configure Trigger
Trigger the Flow When: A record is created or updated
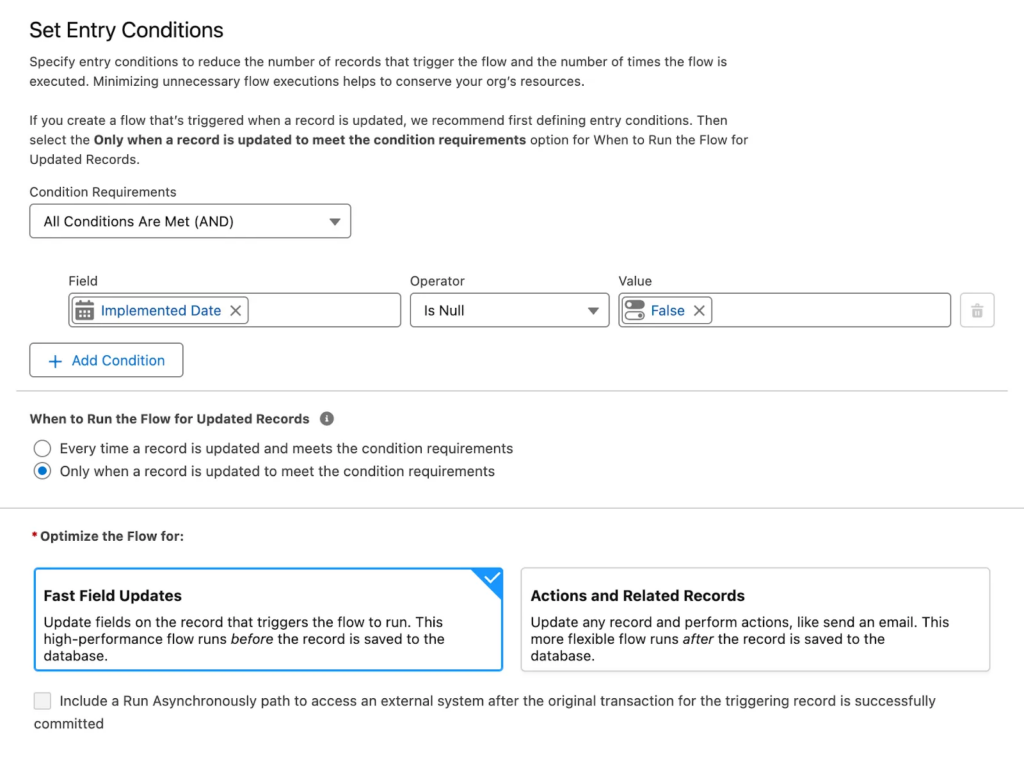
Set Entry Conditions
Condition Requirements: All Conditions Are Met (AND)
Field: Implemented Date
Operator: Is Null
Value False
When to Run the Flow for Updated Records:
✅ Only when a record is updated to meet the condition requirements
Optimize the Flow for: Fast Field Updates
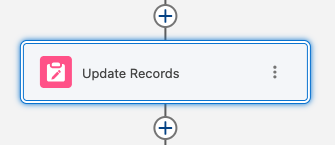
Add an Update Records Element and Activate the Flow
왼쪽의 Start와 End사이에 를 클릭합니다.
Data > Update Records를 선택합니다.
Label: Update Status to Implemented
How to Find Records to Update and Set Their Values:
✅ Use the suggestion record that triggered the flow
Set Filter Conditions: None—Always Update Record
Set Field Values for the Suggestion Record:
Field: Status
Value: Implemented
Save
Flow Label: Update Status
Save
Activate
왼쪽 상단의 뒤로 가기 화살표 버튼을 클릭하여 Flow Builder를 종료합니다.
Try Out the App
레코드가 생성되거나 업데이트될 때마다 비즈니스 로직이 실행됩니다.
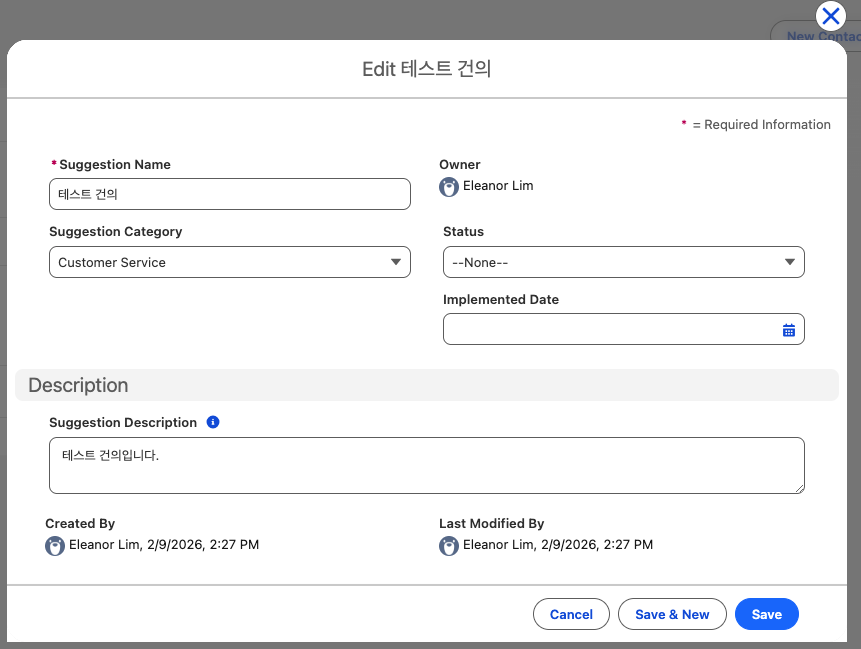
Setup > App Launcher > Suggestion Box > Suggestions > 레코드 하나 선택 > Edit
현재 Status는 아무것도 없습니다.
Implemented Date에 날짜를 입력한뒤 Save버튼을 눌러 주세요.
오늘 이후 날짜를 입력하면 아까 우리가 설정한 대로 에러메세지가 보여집니다.
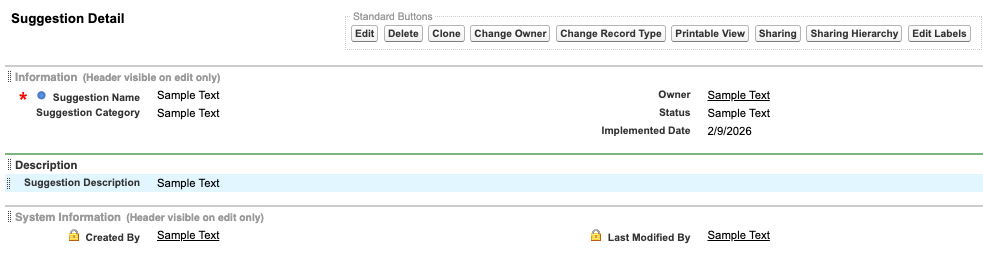
저장을 하고 나면 상세페이지에 Status가 Implemented로 변경된 것을 보실 수 있으실거에요.
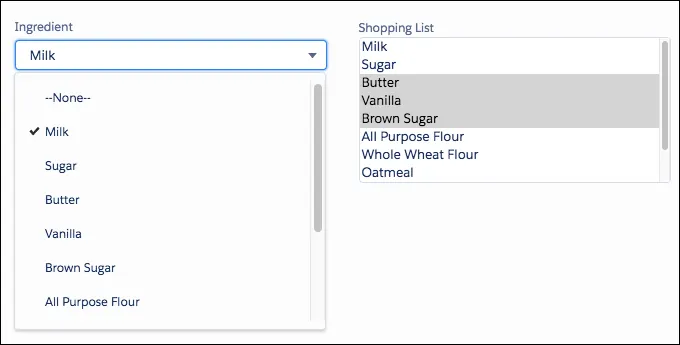
예를 들어 요리레시피 사이트를 운영하는 회사가 있어요. 그 회사에서 레시피에 요리재료를 추가할때 각 재료를 선택할 수 있게 선택상자를 보여주잖아요. 그런데 쇼핑목록을 관리하는 기능도 있어서 새로운 아이템 추가하기를 누르면 선택상자가 재료를 나열하고 그중에 하나를 선택할 수 있게 하는데 첫번째는 레시피에 들어가는 요리재료 목록이고, 두번째는 쇼핑목록이니까 두개가 서로 다른 필드란 말이에요. 그런데 두개의 선택상자에는 결국 동일한 목록이 들어가야하는데 각 필드에서 두번 나열해주는건 뭔가 비효율적이라고 느껴져요. 특히 목록에 재료를 하나더 추가해야할 경우에는 양쪽 필드에 다 추가를 해줘야하는데 너무 시간이 많이 소요되는것 같아요.
그래서 나온 개념이 Global Value Set입니다. 목록으로 나열할 수 있는 값들을 전역변수로 모아서 한 곳에서 관리하고 필드들은 해당 목록을 가져다가 쓰기만 하면 되서 따로따로 관리할 필요가 없어요.
Create a Global Value Set
전역으로 사용할 Global Value Set을 만들려면
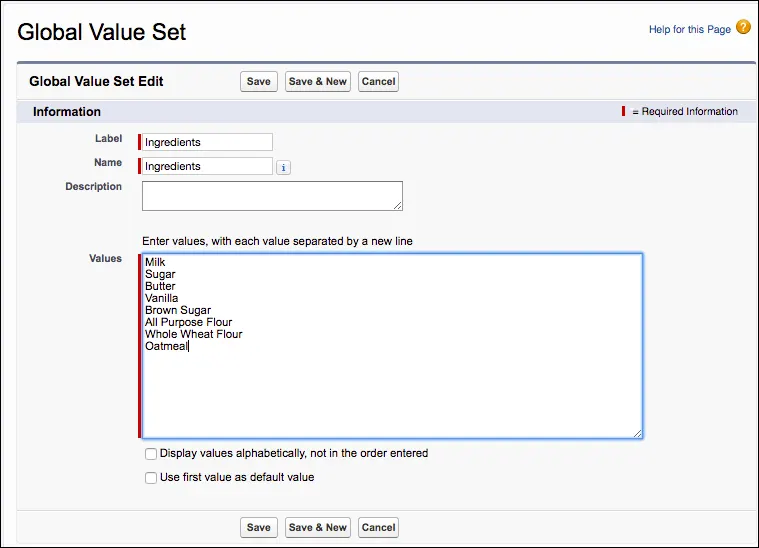
Setup > Quick Find > Picklist Value Sets > Global Value Sets > New
Label: Ingredients
Name: Ingredients
Values
Milk
Sugar
Butter
Vanilla
Brown Sugar
All Purpose Flour
Whole Wheat Flour
Oatmeal
Save
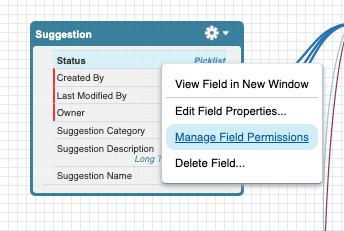
생성과 마찬가지로 여기에서 목록을 수정하거나 삭제하는 등의 관리를 할수 있습니다.
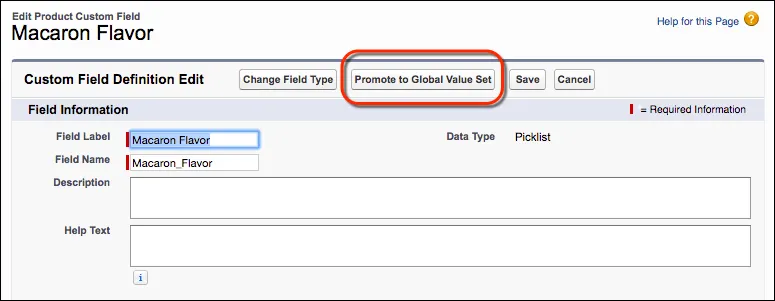
만약에 일반 필드에서 사용하던 목록을 Global Value Set으로 만들고 싶다면 필드수정화면에서 Promote to Global Value Set버튼을 클릭해서 해당 목록을 Global Value Set으로 만들 수 있습니다.
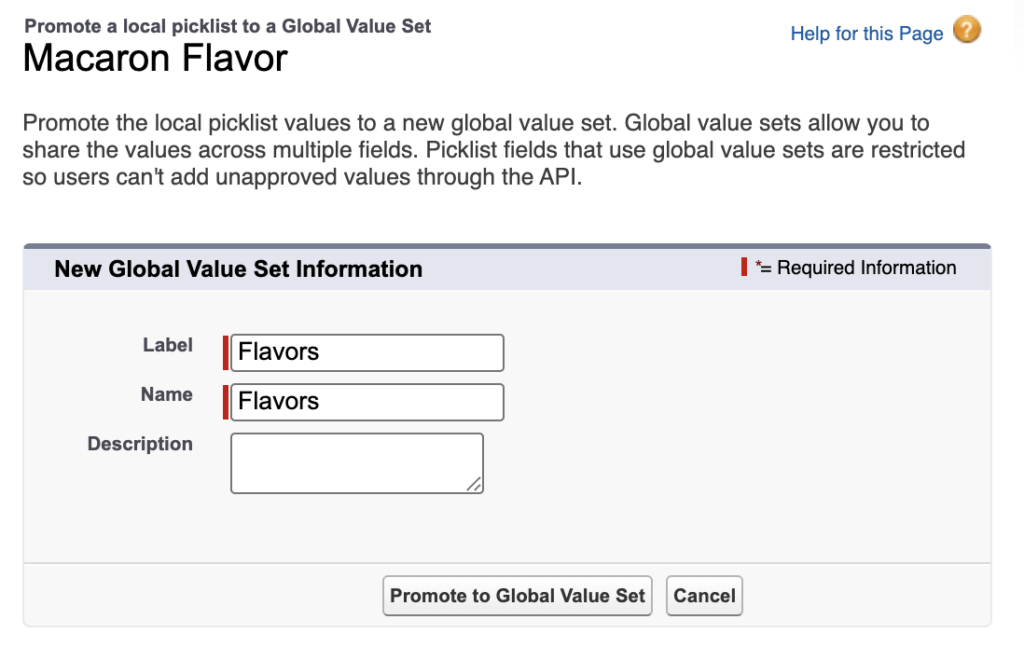
Promote to Global Value Set을 클릭하면 Global Value Set의 Lable과 Name을 넣는 팝업이 뜨는데 이름을 정하고 팝업하단에 Promote to Global Value Set버튼을 누르면 저장이 됩니다.
Promote an existing picklist’s values to a global value set, and assign it to another picklist
You decided to create T-shirts for each of your flavors to help promote them. So you want a T-shirt selection picklist that uses the same values as your macaron flavors.
Promote the values of the Macaron Flavor field to a global value set with the following settings:
Label: Flavors
Name: Flavors
Note: If Promote to Global Value Set is not available on the Macaron Flavor field, then make sure Restrict picklist to the values defined in the value set is selected.
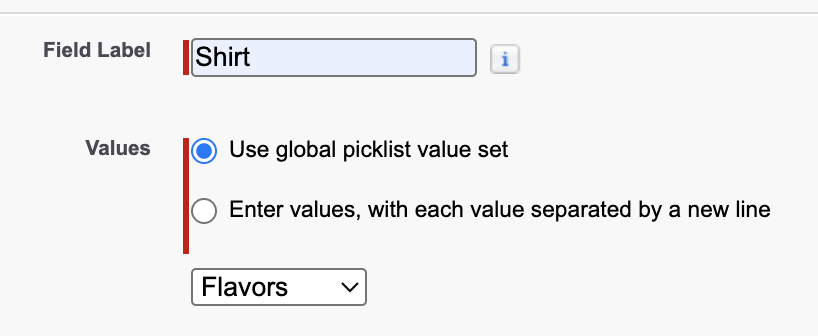
Create a field with the following settings:
Object: Product
Field Type: Picklist
Field Label: Shirt
Field Name: Shirt
Values: Flavors global value set
Make this field visible to all user profiles
풀이
기존의 Picklist에 정의된 목록값을 Global Value Set으로 변경하고, 해당 목록을 다른 필드에도 사용해보세요.
이번에 프로모션 행사로 마카롱 맛별로 티셔츠를 만들어서 배포하기로 결정했어요.
현재 Macaron Flavor에 있는 목록값을 global value set으로 변경합니다.
 를 클릭합니다.
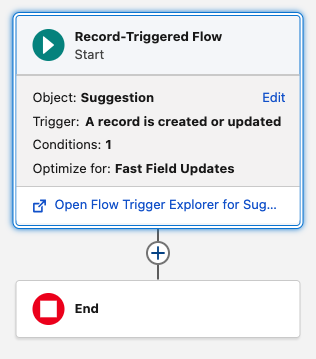
 을 클릭하여 Flow Builder를 종료합니다.